Anda semua masih ingat entry 'nikah doorgift'? which shows my nikah goodies packed in pink paper bag?
in which I promised to show you all the way to fold it? err yes..about 2 years ago??:S
Gomennasai! *tunduk kuat-kuat selame 15 minit di situ*
Anyways, tadi I ter're-publish' my wedding album in facebook *_*
Not long after that, my friend asked me about that pink paper bag:P
And suddenly I had the urge to pay my entry debt about the bags which I owed so many of you which I am much convinced...dah selamat kahwin dah pun...*Gomen ne T____T*
So, it happened that I have some extra wrapping papers here in my office. I just bought a nice sellotape too :P
The folding only took me about 2 minutes to accomplish.
So, I think I got no more reason to postpone it. Here we go ^_^
Goodie bag lipat sendiri tanpa perlu mengukur
1. Lipat any wrapping paper of your interest kepada 8 bahagian yang sama.
 |
| Lipat horizontally dulu into two parts. |
 |
| And lipat sampai jadi gini..senang kan? |
2. So now, you ada 8 petak kan?That's to make 4 bags. So, every 2 petak represent one bag. So, cut out 2 petak together like below.
 |
| 2 petak yang dah di gunting keluar. |
3. Next, pertemukan the two ends di tengah-tengah n selotepkan (untuk hasil yang lebih kemas, use double-sided tape)
 |
| So, you got a hollow shape gini. |
4. Next, get the most bulky gift you have to be used to budget the tapak (usually only needed for the first time, after that you will be so pandai agak:])
*This step is important as it will determine the size of the whole bag.
 |
| So, mine that day, the bulkiest was a box of tat nenas. So the lebar about this la. I have also a small yaasin book and tasbih. Both have no concern for the tapak:] |
 |
| So, lipat ketat-ketat :] |
5. Lipat tapak cantik-cantik and kemas-kemas just like you wrap a present:) The ukuran tapak previously will give a fair adjustment for the height and lebar tepi juga.
 |
| Lipat tepi dulu kuat-kuat. |
 |
| and close the other side. Seal every sisi with selotape. |
 |
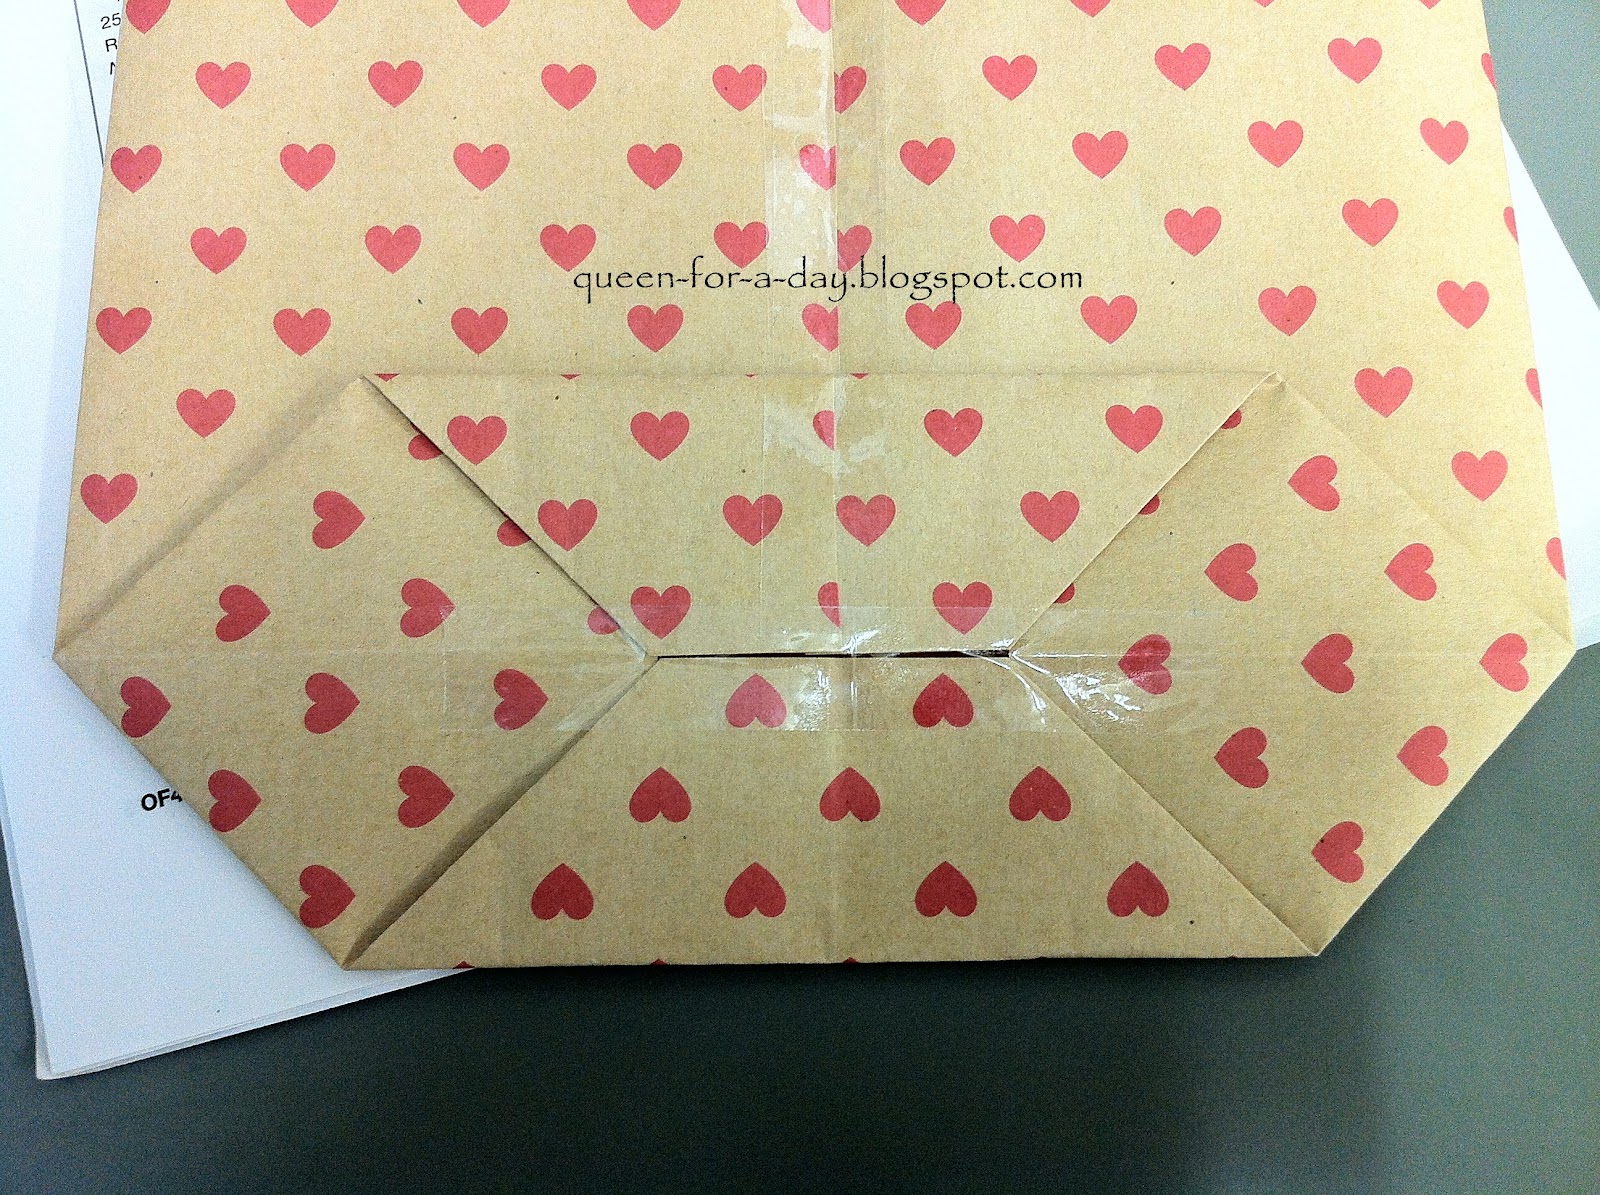
| Lipat tapak tu macam ni. |
6. Now, kita buat sisi bag pula.
 |
| Just lipat both ends ke tengah macam ni. Lebarnya ditentukan oleh tapak tadi ^_^ |
7. Kemaskan sisi.
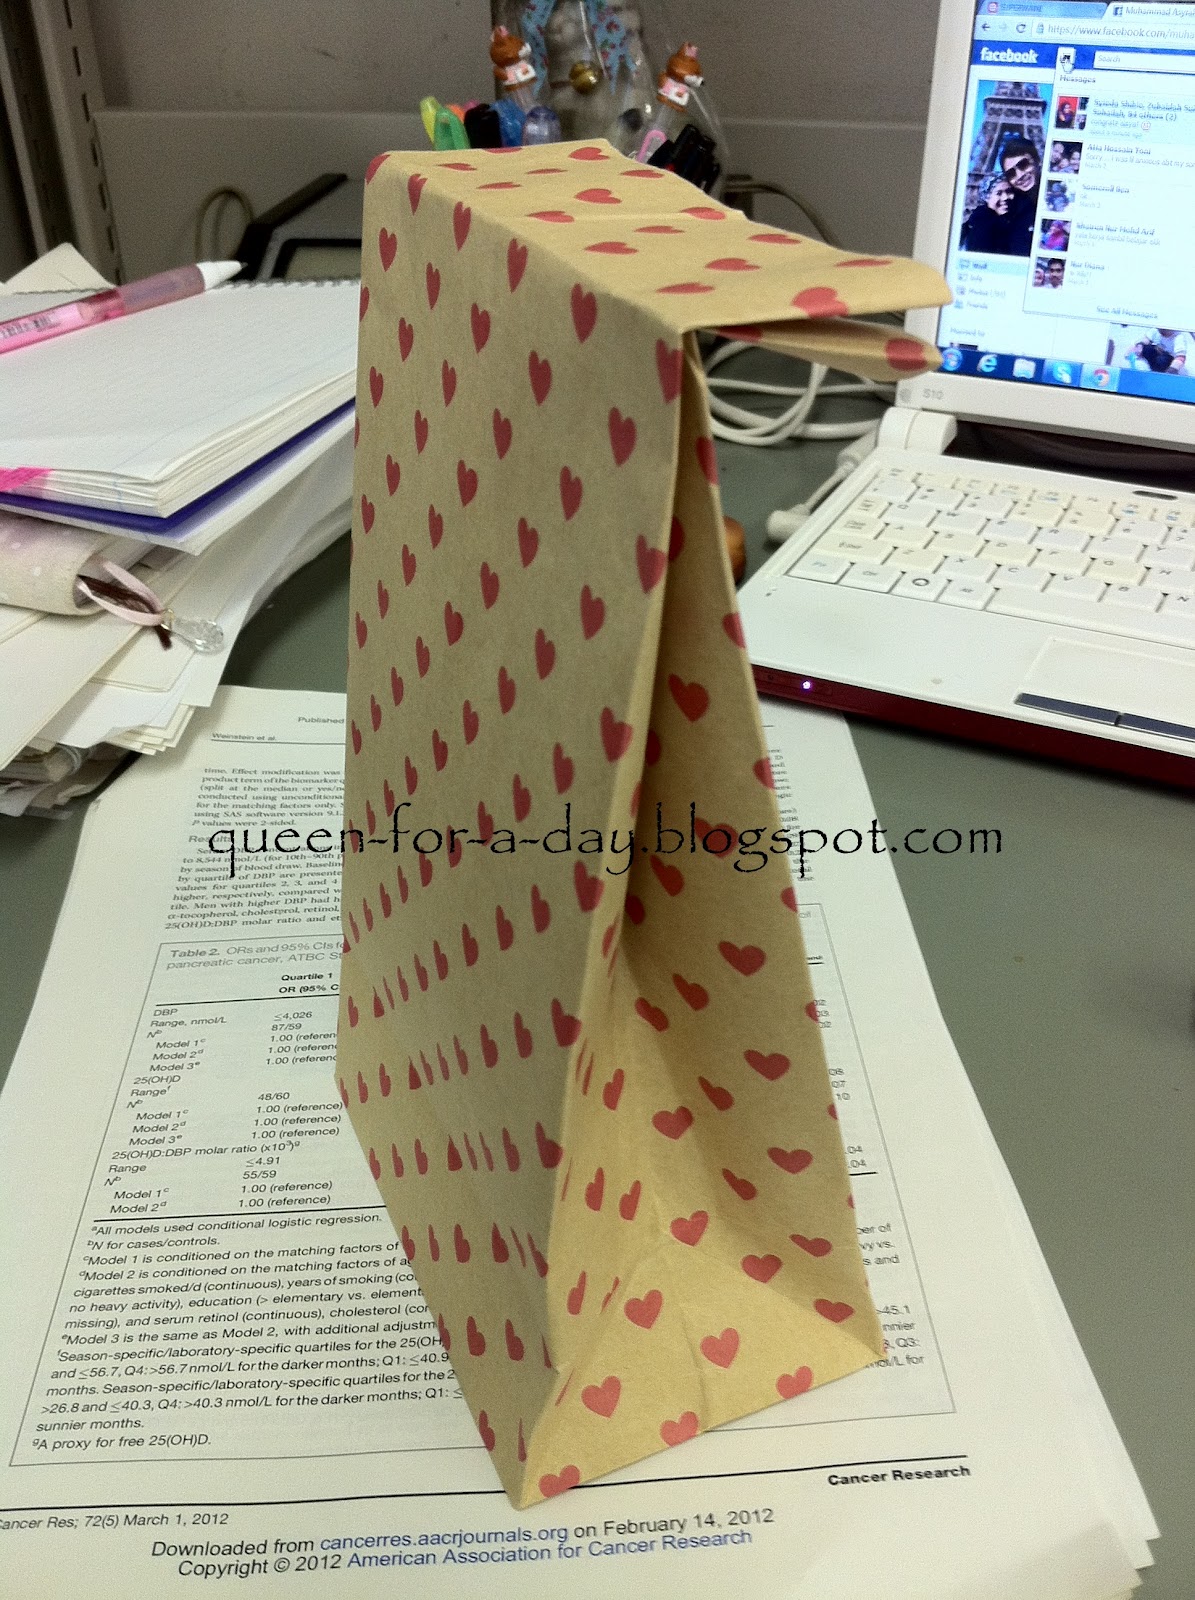
 |
| Now, kembungkan bag anda. You will see something like this. ALmost done right?? ^_^ |
 |
| You all akan dapati lipatan sisi will be somehow not well defined. So, just press nicely according to the lines. |
 |
| Then you'll get a well defined bag lines ^_^ |
8. Hiaskan. Ini terpulang pada anda. Di sinilah anda boleh menjadi kreatif and mencipta keunikan :)
 |
| Last time, I just seal my bag with a ribbon. This is also a trick for a good finishing for the whole ensemble, also save time and cost! ^_^V |
*Tadi I ukur, my bag's measurement is about 11.5cm x 7cm (tapak), 23cm (height-unfold).
Waaaaaaaaaa canteknyeeeee
ReplyDeletekreatifnyaaaaa :))
ReplyDeletetadaaaa... hik hik.
ReplyDelete